Tuesday, August 17, 2010

~slow progress~

All those rows of quilting have caused progress to be quite slow on my Chanel-style jacket - the thread ends need to be unpicked and restitched back into place after the shell seam has been sewn - and there is a lot of thread ends! Next time I will definitely take a more minimal approach to my quilting!


Here's what I did:

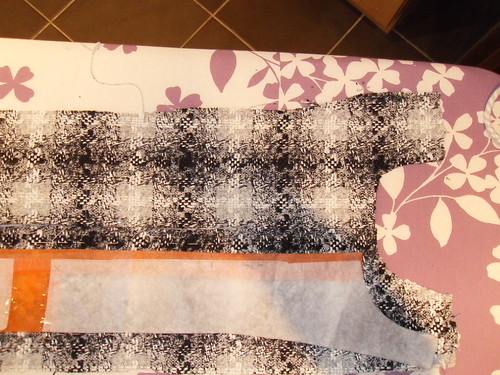
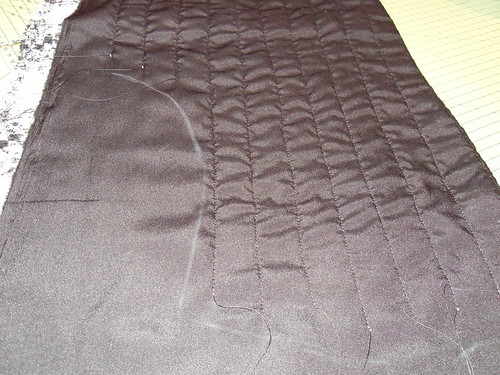
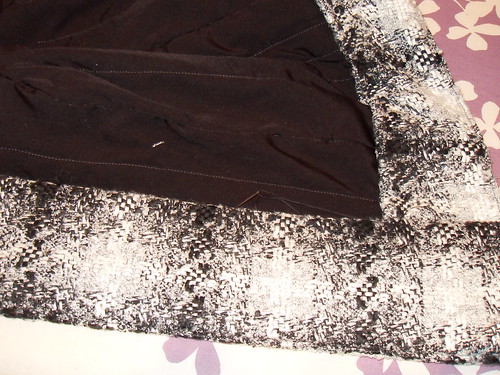
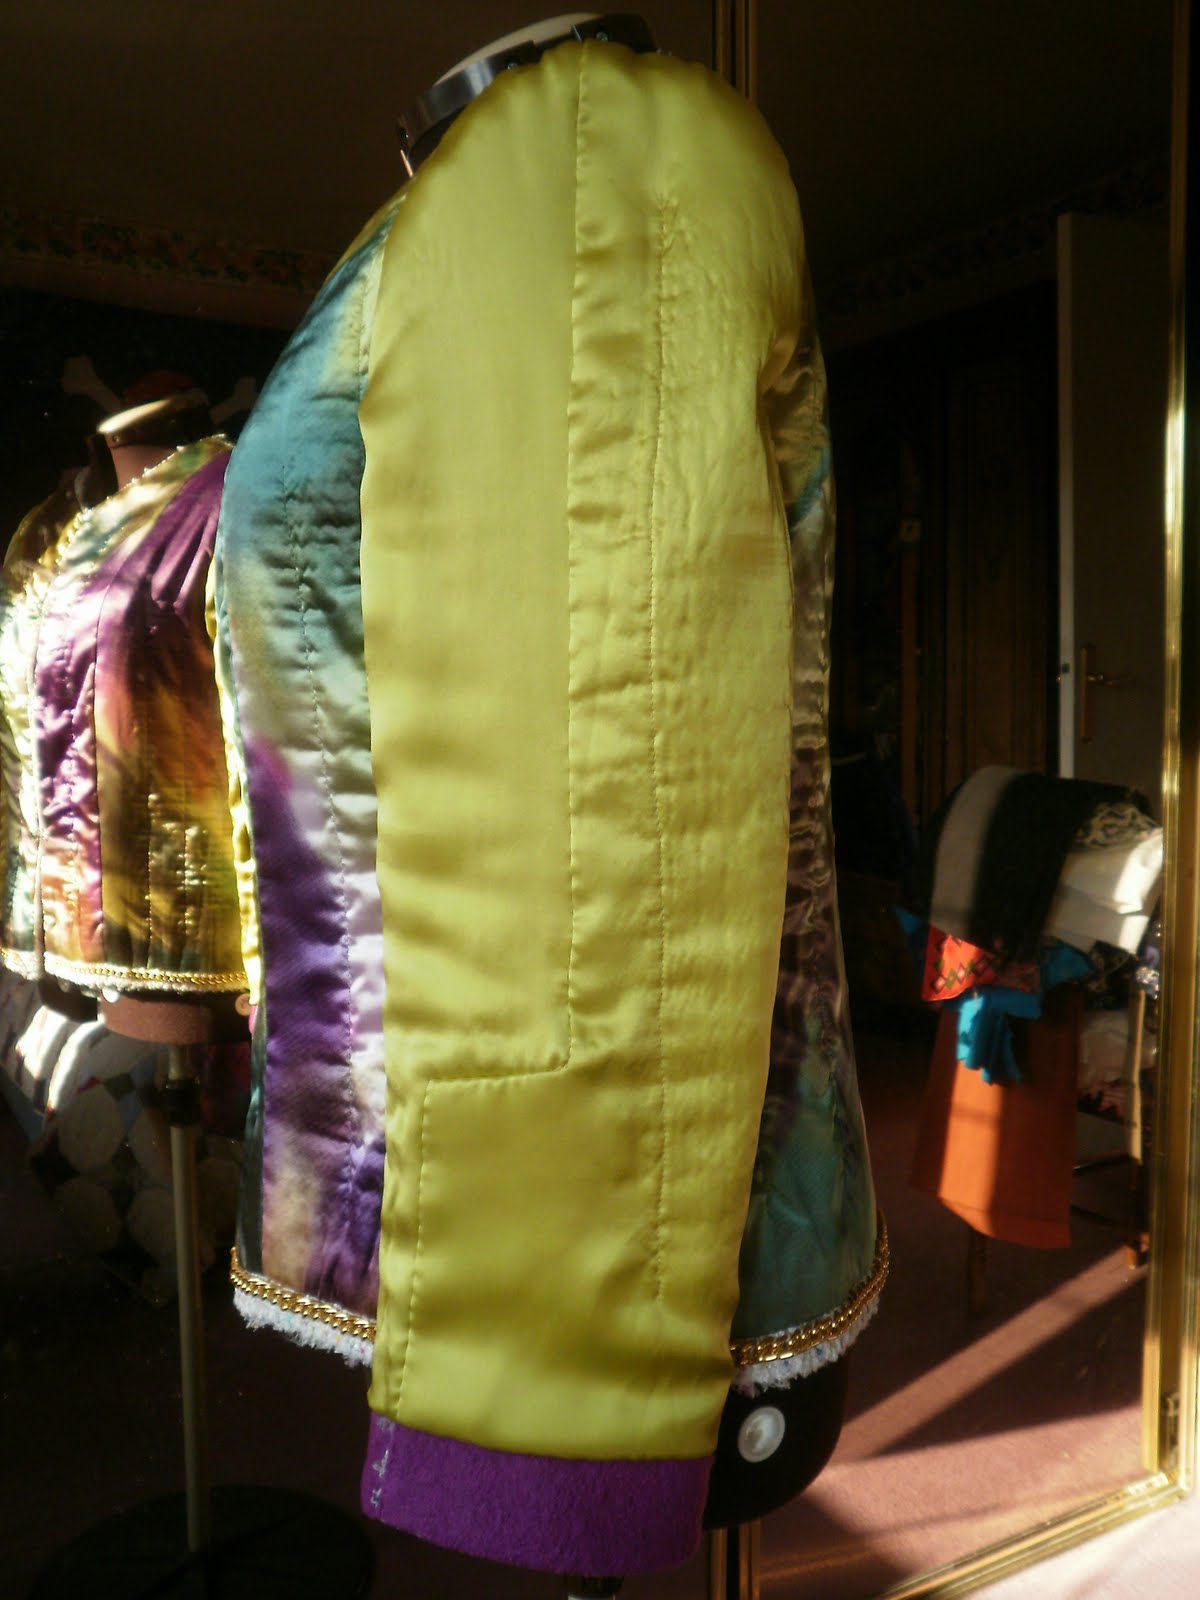
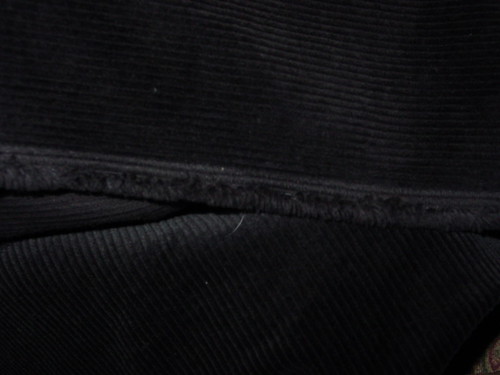
Unpicked the quilting threads, cut the panel seams (being careful not to cut the threads), and sewed the seam by machine:


Pressed under the seam allowance on the centre back panel, and lapped it over the seam allowance of the side back panel:


Handsewed the lining seam using a fell stitch with 3mm spacing:


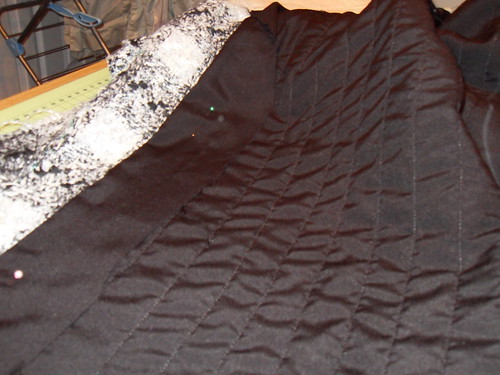
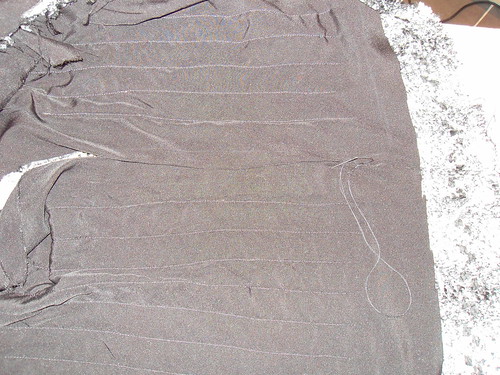
This is how I sewed fell stitch:


Proof that I completed a whole seam in fell stitch! Now all those threads need to be stitched back into place:


I backstitched the ends in place, following the needle holes from the previous stitching, and it looks a little bit hand done, but close enough to the machine stitching for me:


Of course, on the right side there is an equal number of thread ends to be handsewn back into place too.....

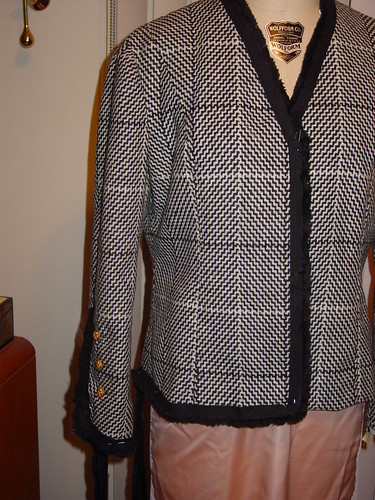
And that is just one side back seam! I have completed the other side back seam, and will start work on the side seams shortly. See you next month.....!

A couple of things I learnt through trial and error:
  • Leave long thread tails when machine quilting.
  • Overlock panel seams once cut, to prevent fraying. (although backstitching the quilting threads does help to stabilise it quite a bit)
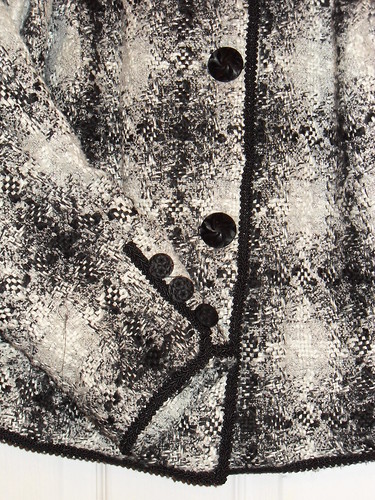
  • When machining the seam, make sure that not only the checks/plaid matches, but the quilting lines match too - I was half a quilting row out when I sewed my second seam.....
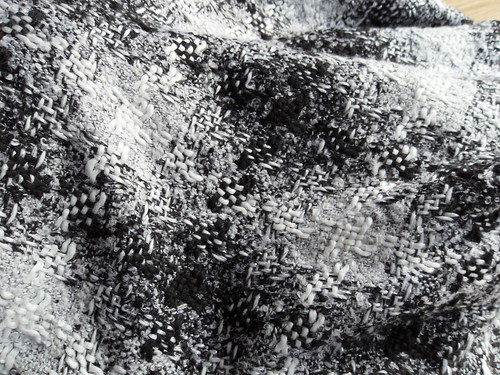
Wednesday, August 4, 2010

~my chanel jacket - the beginning~

Hi everyone! I'm Sherry and I've just begun my Chanel-style jacket, after having the fabric for a few months!  I hope to share it with you here as well as on my sewing blog pattern ~ scissors ~ cloth.


As you can see it is going to be a fairly standard shape, so I started from my existing jacket block with a princess line, which is a standard NZ size 10, and I graded it up to my measurements, which are a mish-mash of sizes between 10-14!  I made a quick calico toile, and it fitted perfectly - I just need to rotate the sleeve forward slightly. I am after a cropped fitted look, so I will shorten the body to high hip level and the sleeve to 3/4 length.

Luckily I happen to have perfectly matching silk/cotton in my stash, and I will use this for the lining. I have 5m of this silk/cotton, so might even make a matching blouse just like Chanel used to do!
 

I played around for ages experimenting with trims - I unravelled threads from the cloth and plaited them, crocheted them, and mixed them with existing trims I own. But have finally settled on simply using the selvedge like in the above photo. The fabric reverse has a lot of black threads so it provides a bit of contrast, and the selvedge is pretty cute. The left and right selvedge is slightly different though, so I won't be able to use them together.

And I couldn't help myself, I had to immediately cut out the back blocks and start quilting to see how it would look!:


I machine quilted in the lines of every second check repeat, which amounts to quite a lot of quilting! But I quite like the effect - just like a Chanel handbag ;)
 
So I imagine I will be seeing straight lines for the next few days!

Monday, August 2, 2010

Chanel progress

This jacket is taking shape slowly but surely. For a more detailed progress report see my post at My Fabrication

Wednesday, May 19, 2010

And eventually everything went together

I reported the stitching lines on the fabric with basting thread and on the lining with tailor's chalk and then I cut the fabric and the lining keeping large seam allowances.
SDC10756
Then quilting the lining was easier than expected. I used a walking foot for this.

It is really important to keep the quilting lines an inch away the stitching line or it would be really challenging to sew the jacket by machine (don't ask me how I know....). To sew the pieces together, the lining seam allowances were kept away from the stitching line with pins.
SDC10755
Once the pieces were sewn together, the lining was sewn by hand, concealing the seam allowances.
SDC10765
And finally the hem and the facing were hand sewn:
SDC10772
I did most of the hand stitching during a looooooong phone call.

My jacket was almost finished:
SDC10784
I just had to choose buttons and braids.

I wanted to go for contrast, and I fell in love with a red braid that I bought without thinking twice. Once at home, I pinned my lovely red braid to the jacket:
SDC10786
The result was not exactly the chic jacket I had in mind... so I did not stitch the braid to the jacket and kept thinking about it...

Since my husband has a kind of "Chanel eye" for buttons, I asked him to choose some buttons for my almost done new jacket. I would have chosen white pearl buttons... he came home with black buttons instead. But he was right and I finally chose a black braid to complete my jacket.

Here you are my Chanel style jacket, what do you think about it?
SDC10791
A detail of the sleeve vent, the buttons and the black braid:
SDC10790

I love this jacket and I have been wearing it a lot during past two months!!!
SDC10794
You can't see the matching red shoes in this picure...

Friday, April 23, 2010

My jacket is finished

I've worn it this afternoon. I can say it is very pleasant to wear and light as a feather. What I like best is the lining ...


and the functional sleeve vents and hand buttonholes


Nevertheless,though I made a muslin and I am not happy with the sleeve heads. I supposed it is because the sleeves are not from the same pattern as the bodice. The shoulders shoud be shorter I think, too bad realy. Another explanation is perhaps that the shoulders seams elongated because they have not been staystiched. This has just occured to me. Anyway I will have to do with this. I will try not to think about this when I wear the jacket. Here is what it looks like seen from the back


Saturday, April 17, 2010

...and the pattern. Oh, the pattern!

When it was time to choose the pattern I recalled I had seen a Chanel style pattern on Burda Magazine 10/2009 - 128. I started working with it, making the alterations I usually need. I could not make it fit, no matter how I tried...  It was probably a wrong combination between the checked fabric, the diagonal dart and the amount of fabric I should have added to make my FBA.

Then Burda Magazine 02/2010 was published and pattern 108 simply called me from the pages of the magazine.

I tried altering again the pattern from the October 2009 issue with no success, then I finally decided to try with the pattern from the February 2010 issue. It worked at the first try!!!

My idea was to distort the fabric grain as little as possible, so I transformed the vertical dart into an armhole princess seam and moved the back darts into the side seams.
I wanted the front pieces to overlap to have buttons (the original pattern did not overlap), so I separated the facing piece from the front piece and added the necessary amount to get it.
The sleeves, finally, were too close fitting, so they needed to be enlarged.

A lot of work, but I had a pattern for my jacket!!!

Here follows my pattern modifications:

armhole princess seam + full bust adjustment:


Full arm adjustment:


It was time to play with the fabric, then!

Wednesday, April 14, 2010

… et Voilà, ma veste Chanel!

Assembled jacket before Chanel finishing touches.

This is as far as I got last year before the heat wave hit Sydney and it was way too hot to be sewing wool. However, I have never considered this project a UFO. It has stayed out on my dress form and I have played with different trims, finally deciding on the dark purple from E.M. Greenfield (hand washed in warm water with mild soap to pre-shrink before stitching in place).

The final embellishments also included:
  • Making the pockets
  • Attaching a couple of small hooks for closure at front
  • Stitching the chain weight to the hem

Chain stitched in place along hem edge.


Chanel jacket showing trim and pockets at front.


Back view of Chanel jacket showing fit & shaping.

This was such a fun project. Thank you Cindy and Antoinette for setting up the sew-along and to everyone else for the inspiration and camaraderie. Now I'm looking forward to the cooler weather!

Saturday, April 10, 2010

It was the fabric first

Hello! I'm Challis, and I have been reading this blog for a long time. I have been inspired more than once by the Chanel style jackets posted here and I just completed mine.

Before all, I would like to thank Antoinette and Cindy for setting up this blog and for letting me post here and I'd like to congratulate with all the nice people who post here.

Let's talk about the jacket then!

I fell in love with this black and white boucle during last Autumn, and I have been wondering what to make out of it since then.


That is when I first met this blog and I started reading and following... it would be nice to make a Chanel style jacket with the boucle, I tought.  So the boucle I loved came home with me and my sewing adventure started.

Here follows another picture of the boucle, it is a blend of wool, polyester and lurex. Unfortunately the nice silver sparkling thread is not visible in the picture.


I cut a sample, to put in the washing machine. It came out perfect, so I pretreated all the fabric with the washing machine in a delicate wool cycle.
It was time to choose the pattern then.

Friday, March 12, 2010

Chanel trim - I think I finally have one

Almost finished with the jacket muslin, but have stalled out because I couldn't find the trim for it. The trim was already in my stash, in a most unlikely place.

DSC03511

I've been prewashing fabrics, serging the ends and putting them through the dryer because I don't want to dry clean anymore. Besides the cost, the idea of petrochemicals used in the process just doesn't appeal to me. So in one of my free bundles from Fabricmart, there was a black 8 wale corduroy. I wasn't really sure what I would do with it, but prewashed it and ran it through the dryer. What resulted was a soft fringe along the selvage.

DSC03513

So I counted two wales in from the selvage and trimmed, then finished the edge with the serger. Since the wool on the jacket is a bit fuzzy, the corduroy side was too dark, so I'm using the wrong side. I'll have to plan the placement carefully because the there isn't enough to do everything I had planned, but so far I like the way it looks.

DSC03514

DSC03515

I'm happy I went through the entire process to complete the muslin because there will definitely be modifications made to this pattern. I'm not sure if anyone else has found this but the button placement on the three piece sleeve is a bit more "forward" than I am used to. If anyone else has made this sleeve and cares to comment, I'm all ears!

Please forgive the caving in of the jacket I really need to pad my dress form, oh and disregard the wrinkled slip under the jacket:)

Saturday, March 6, 2010

Why I've reduced my activity.

My husband has been diagonised with a transient ischemic attack due to a atherosclerotic plaque in one of the carotid arteries. He is in hospital waiting for the removal of the atherosclerotic plaque by surgery and he will have to rest for some monthes before he is able to work again. Of course my sewing and blogging activities will be slowed for some time. But I will still be reading my blog roll.

Tuesday, February 23, 2010

vogue 8259 three piece sleeve

Here are some pictures of the sleeve :


I absolutely love the result. The functional vent makes all the difference and gives the jacket a couture look. I do recommend this pattern.
Here are some close up views :
 
 The buttonholes were hand sewn with Gütterman silk buttonhole twist.
Apart from the quilting, the lining was completely hand sewn with beeswaxed thread following Claire Shaeffer's very detailed pattern instructions. I chose a contrasting fabric for the facing.


Yesterday I just had to pin the sleeve to the jacket and put it on to see what it looked like. Wow I loved what I saw in the mirror. This sleeve pattern is very well drafted and has a unique line indeed. I am so impatient to finish this project.
Hopefuly my next post on this blog will show a picture of me modelling the jacket.

Sunday, February 14, 2010

Enthusiasm and my lack there of….

OK…I just haven’t been in the blogging mood as of late. So many other things on my mind and to do but today I am making myself sit down and write a few words about my Chanel jacket project. With a cup of coffee in hand and the Olympics on the TV please join me in my musing on my jacket.

Over the past several weeks I have acquired the pattern and resource materials to begin this project. Along with this I purchased the fabric and have now found the lining and thread that I want to use to quilt the jacket with. I am going to think outside the box and add my own spin on my jacket. I found the perfect amber colored lining to go with the boucle that I had purchased from Gorgeous Fabrics and while cruising around Joann’s the other day I came across this great variegated quilting thread that I thought would look great against the lining color and add my own flair to the project by tying the colors of the boucle on the outside of the jacket to the inside lining of the jacket. Here are a few photos of the choices I made for the fabric, lining and thread.


I’ve also traced my pattern off and adjusted it for my measurements. Being 5’10” I have of course added 2” of length to the sleeves and shortened the body by one inch. I also adjusted for my bust, waist and hips. It took me a great deal of time adjusting the pattern. To accomplish this task I used “Pattern Fitting with Confidence” by Nancy Zieman. I have never used her pivot and slide method so thought I’d give it a try to see how it would work on me. Needless to say it took me a whole Saturday bent over my table making my tissue pattern and adjusting it. Here are a few pics.

On Sunday I took the opportunity to cut the new pattern out of my muslin. I’m using the Vogue 8369 jacket pattern which has princess seamed front and side front pieces along with back and side back pieces. The jacket has a two-piece vented sleeve. This pattern doesn't have a pocket option so I may add one to it. I'll play that one by ear and test it out first to see whether I would like it or not.l As I cut each piece out I took the time to mark a full vertical grainline and horizontal lines at the bust and waist along with the various required markings for the pattern with a Sharpie black marker. Here are a few photos of the unsewn muslin.
Front and Side Front Pieces

Center Back and Side Back Pieces

Two-Piece Vented Sleeves


This is where my enthusiasm waned because my plans for sewing this past week were interrupted by a visit from my DD and her boyfriend and this weekend we went north for the Winter Carnival in Saranac Lake and today…here I sit writing this post. I am hoping that after lunch I will gain enough momentum to get myself into the sewing room to begin constructing my muslin. Wish me luck for I am finding it extremely difficult to remove myself from the warmth of the fire!

For your enjoyment some Winter Carnival Ice Castle pics.


Instead of "Happy Trails..." I'll say "Happy Sewing to You...."