Saturday, January 30, 2010

Got it!!!

My fabric arrived from Banksville. It was in a box in a plastic bag in a raging blizzard on my back porch. Since my ride home was one of the worst of my adult life it was a great treat to come home to find my fabric surprise. Did I start ripping the box open. NOOOO, first pour a litttle pinot grigio, (that drive was unnerving), prop myself up in a quiet room on a fluffy pillow and start to pick apart the tape. Yippee! Caroline and Lindsay have had some great posts and commentary on buying on line lately. I seldom do it. But I think I will again with this particular vendor, Banksville. It seems we each have our vendor we feel comfortable with and buy from them. It feels risky handing over the plastic and crossing the fingers. Swatching is the way to go IMO. So without further ado here it is:


I had a horrendous time getting the lighting and therefore color right. DD, an amateur photog, told me to take the picture in morning light outside. So, I draped the fabric on the back porch and clicked away. Oh, did I tell you it was 8º below? See, Dawn, your not the only nutty, brave stitcher out there!

The silk lining is a gorgeous taupe with a definite pink cast and the combo looks very rich. The boucle is pink, a pretty brown, taupe, and off white. Some of the threads glisten which I like and you can see that here:
I have decided that what I would really like is an edge to edge no collar jacket, the classic. Vogue 8259 is quite structure, IMO, and I think the collar gives it a more formal look that will not give me as many opportunities for wear. So still thinking about it all....Bunny

Miracles do occur!!!

Finally finished with this elegant piece, and what I find most about this jacket was how all my normal life took me away from it. There's no greater way to show a garment than through a little video....so here's the jacket finished with more pictures and verbiage on my blog!

So here's my little video - you'll have to turn up the volume as it was low. Also sorry about the rez....hopefully this will show up well.

Friday, January 29, 2010

Red Friday to suit

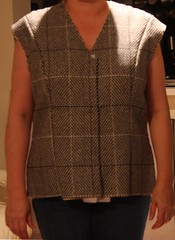
Yes, dearest friends, I can postpone the inevitable no longer: the suit is done, completed, finito! but to see it, you'll have to mosey down to my blog, because, with profound apologies to you all, I just don't have the time (or the patience, or the inclination) to duplicate posts across the ether. But, OK, it's only fair that you get a picture:


How and what did I do?
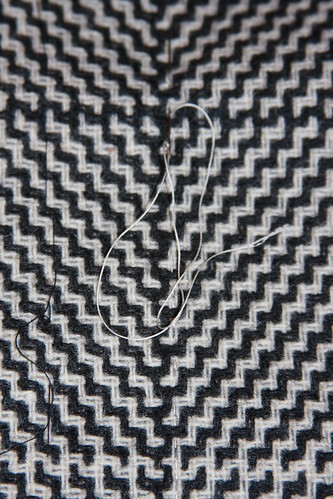
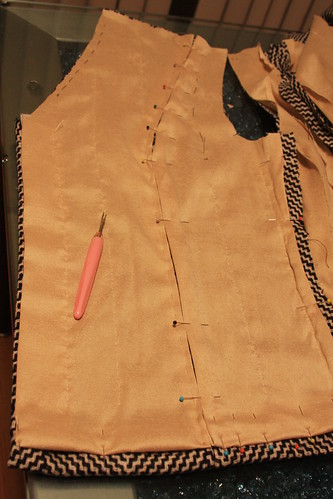
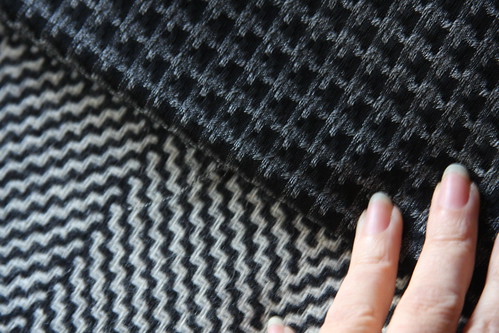
My bouclé was a really light and airy, fluffy, stretchy wool-mohair bouclé. I knew that to keep its shape it would have to be underlined. Fortunately, I found a perfectly colour-matched red poly organza for underlining. The jacket fronts & sides are underlined, as is the entire upper back all the way around the armscyes, and the entire hem. In retrospect, it would've been easier to just underline the whole lot instead of snipping here & there. A little info tidbit for next time, and yes, there's going to be next times! Each bit of underlining has been painstakingly stitched at 1.5 cm/ or 1/2" intervals, to the fashion fabric, to serve as a scaffold. I'm sure that otherwise the whole lot would just have stretched out of shape pronto! The skirt, BWOF 9-2008-120 pencil skirt, is underlined the same way. I had frightening visions of poochy backside after sitting on it for an hour or two, never to return to the desired shape; atomic-bomb indestructible poly underlining ensures that'll never happen. The sleeves however are NOT underlined. Instead, they're nice and skinny and totally flexible.

Both jacket & skirt are lined, the jacket with stretch silk charmeuse, the skirt with red heavy bemberg rayon, with thread tacks to keep it down, and a shiny down-to-there gold zipper for a bit of vertical interest.

I sort of quilted the lining, but only barely, by hand. What I mean is that the 3-piece sleeves were constructed with the lining, and the lining hand-quilted down to the FF at the lower reaches of the sleeve only. I bagged the body lining, prick-stitched around all the edges, and then used a modified bag-the-sleeve-lining technique to attach the sleeve lining to the body lining. The lining's quilted to the ff/underlining along all the seam allowances. I intended to also hand-quilt the lining down to the ff at 1" intervals, but was persuaded by hubby that this would serve no practical purpose. He's right, of course! What a relief, too. I did all the bottom hemming & chain attachment by hand, with lots of steam to shrink the wool hem into shape.

And, of course, all the trim was attached by hand. As were the pockets and the hooks. Chanel couture really tries one's patience, you know?

Pockets: there are the requisite four pockets, two big, two small. However, as I'm fairly generously endowed and don't need any more attention UP THERE, especially in a work setting, I chose to overlap my pockets somewheres-about my waistline (OK, a bit below my waistline). Each pocket is double-lined, so there's yummy silk on both sides of your fingers should you wish to slip them inside: my son went oooooh!!!! when he tested them. Yeah, more hand sewing - lining to pocket, pocket to jacket, lining to jacket. But it's kind of cute to have four super-soft change pockets about one's person.

Other than that? Hmm, that skirt is majorly Pegged. What that means is that for a really comfortable stride you'll want to either: 1. shorten it by 5 cm / 2"; 2. create a vent, slit, or box pleat at the bottom centre back; 3. un-peg it (stylistically, NOT an option! do NOT do this!!!). Don't get me wrong, I love it as is, but I couldn't outrun a caterpillar in it. A fuzzy fat caterpillar.

I promise I WILL post a live pic of the suit on MOI, and you'll find it on StraightJacket Muse, here. And I'll update this post for the in-action photos once I do.

ETA: The on-me blog entry is here and here, and the PR review is here.

Wednesday, January 27, 2010

Wanderlust to Chanel


After Wandering Aimlessly for the past month...I'm back and now ready to delve into the making of my Chanel jacket. I have finally decided upon Vogue 8369. There were several choices that I had been contemplating but I truly loved the V8369 due to the neckline and the longer length of the jacket. I’m 5’10” and am short-waisted with very long legs so the shorter version jackets that I’ve seen other participants make won’t work for me.

It has taken me a while to find this out-of-print pattern. The Vogue Patterns website does still offer it but only in the smaller sizes so I have been on a constant search since the past December. As luck would have it I was clicking around the internet the other day and happened upon Pattern Mania on Etsy and low and behold she had the pattern in the larger sizes and at a very reasonable price. I ordered and paid for the pattern on Saturday the 23rd and I received it today, Wednesday the 27th. Very fast and nicely shipped in a cellophane sleeve and shipping envelope. I’ll definitely purchase from her again!

I’ve also been compiling some reference and resource materials to aid me in my sewing of this jacket. I received “Couture Sewing Techniques” by Claire Shaeffer from my daughter for Christmas. What a fantastic gift!!! Prior to receiving this gift, I had purchased “Great Sewn Clothes” from Threads. I am now on the search for Threads Magazine No. 121, pages 34 – 40 for the “Inside Secrets of a Chanel Jacket” article by Susan Khaljie. Tough issue to find…wish me luck!  Any help in finding it would be greatly appreciated.

As far as fabric goes, for my first jacket I am starting with a boucle that I purchased from Gorgeous Fabrics. I chose a fabric that had a combination of browns, golds and oranges. As always the picture doesn’t do the fabric justice. The jacket will be the perfect color for fall in New England. This is the first time I’ve chosen a fabric in these color ranges. I usually stick to mauves and purples...I’m trying to break away from the norm...walk on the wild side for once...if you can call this fabric wild.

Now that I have the fabric in hand I can now make a better call on the lining color too. I found a real nice silk on Fabric Mart that might fit the bill. Have to look into it a little bit more along with getting thread to match. In the mean time I’m going to look over the pattern instruction sheet and notes by Claire Shaeffer, press the pattern pieces and adjust them as necessary and then cut and sew the muslin.

I am now off and running...all be it very slowly!

TTFN ~ mimi o ~

Sunday, January 24, 2010

Progress is slow but rewarding

Here is a quick run down of the progress to date.

Muslin completed, I cut two sizes smaller than called for, based on cutting out and completing another Claire Shaeffer pattern. As you can see it's very fitted, so I added to the back seam and a 1/4" to all of the pattern pieces. I also shortened the jacket and sleeves.
Chanel front muslin PL

The first fitting
I found it to be a little big and boxy, so some adjustments were made to make it a little more fitted. Since this is my muslin, I found the fabric to be a little thicker that what I will be making next.. Since the adjustments were minor (I noted them on the tracing but did not make the adjustments on the paper pattern).
basted jacket no sleeves front

The lining has been hand quilted with silk thread, I followed the lines of the plaid on the reverse and found that in some areas the stitching came too close to the seamlines and had to be restitched. Leave yourself at least 2" from the side seams and 4.5" from the bottom (I had a 2" hem, and this gave me a little leeway).
Hand quilting with silk thread

Now it's at the lining assembly.
005

Thursday, January 21, 2010

Just joined too and excited!

Allow me to introduce myself, my name is Bunny and my blog is La Sewista.  I have been reading this blog since the start and finally feel I have the time to get started on this intense project. I will using Vogue 8259. It have been given to me on loan. I have traced ALL those pieces, oh my, onto heavy tracing paper. As soon as I get into town I will get the directions copied on large paper and then it will be off in the mail to the kind heart who sent it my way. I got my samples from Banksville Fabrics last week and must say I was pretty impressed with what they sent me.


I have made my final choice and as soon as it arrives in the mail I will post. I know I will have many questions along the way. I am going to do this pattern, View A, the couture method. Here's my first cry for help. I am v. petite, 5 feet tall, and have hips. I look at those sleeves, and they are beautiful, but I know that the buttoned vents loaded with trim will land right at my hips. I can see them adding bulk to me in an area where I don't need it. I adore 3/4 sleeves. Is there such a thing as a vented 3/4 three piece sleeve? I may go a straight 3/4 but if I can do the vent/buttons I would be happier. Has anyone done this? Thanks so much, and I will be posting as I go along. Great to see you here, Claire. Maybe we can egg each other on.......Bunny

Tuesday, January 19, 2010

Am I too late?

Holy Cow! I actually can't believe I'm this late....but I'm getting this done!

What is so interesting as I'm working and working a long, long time, I'm thinking, "How much do these run in RTW and even couture?" So I looked this up.

Here's the site that says they are $5,000 for off the rack (which I think is cheap), and up to $20,000 for custom. And let's face it - that is exactly what we have here...custom made Chanel Jacket. Here's is the jacket from that site: (this isn't my jacket).

Lamp

Will post some pictures and other pictures here, cause I sort of developed some interesting techniques along the way!!

And I am pleased with how this is coming. I have to do some work for a client, and then back to my jacket!!

Friday, January 15, 2010

Jerilyn - Houndstooth Dentistry

Or perhaps you'd take houndstooth to the Veterinarian? I'm not sure.

Upon dissecting the mens blazer that I will be using for fabric, I discovered 4 holes in one of the inner sleeve panels. My guess is that they are cigarette burns.

Here's how I repaired the damaged "teeth":

Step #1 -

I was able to salvage some black interfacing from the sleeve cuff, it easily tore away from the fabric, so I wasn't sure that it would re-fuse upon ironing, but it did!

Step #2 -

I stitched back and forth over the holes with black thread to prevent fraying. (the 2 larger holes are pictured below)

Step #3 -

Lastly, I used a small tight zig-zag with cream thread to mimic the original pattern.


It's not perfect, but I couldn't afford to lose any portion of the fabric, and it shouldn't be noticeable from a distance.


As for my muslin, it's as far as I'm planning to take it:


I added darts to the chest, and then fixed the arm hole to compensate for the darts. I'm going to cut my panels longer than the pattern/muslin because I think the length is appropriate as it hits unhemmed.


The next step is the most challenging... figuring out how to cut all these panels out of the original jacket! The sleeves had an inner panel similar to the pattern so they will go smoothly, but the back is 2 panels vs the 3 panels of the pattern, and the front... oh don't get me started. There's a small breast pocket on the original jacket that is making me pull my hair out, but I figure it's all downhill after surviving this (she says with the blind optimism of someone at the beginning of the this project).

I'll be sewing this weekend... will you?

Wednesday, January 13, 2010

Lourdes (ELMO)- Old Kid, new to Chanel Block

My room mate from college had a Chanel jacket, I immediately asked her if I could see it and turned it inside out trying to figure out how it was made. Her version was black boucle, long sleeves (to wrist), princess line seams, side panels, a peplum, gold double C buttons and that chain at the back hemline. It was such a beautiful fit and she always looked elegant and very pulled together when wearing it... I WANT ONE!! So after many years, this will be my first, I'm starting off easy with two of Claire Shaeffer's patterns. My muslin is finished, and as Claire says "we need to warm up", so my first fabric is not my first choice, but it's really not bad, just looks more Armani.

It's the one on the left, the other is tropical weight... maybe for the next one.
002

The body.
Patterns 015

The three piece sleeve.
Patterns 009

Tuesday, January 12, 2010

Jerilyn - New Kid on the Chanel Block

Hi, this is my introductory post... I'm definitely getting a late start, but too many stars aligned after discovering this blog, so I felt compelled to join.

I do a lot of refashioning which I share on my personal blog and a refashioning blog. I saw "Coco Before Chanel" a few months ago and was inspired to dress better, but then I came across this post by Mary Anna who said "For me it's more about sewing in the Chanel spirit. Taking a piece of menswear, and turning it into women's wear in a simple, fitted style." and I knew this was the challenge for me, the refashioning addict!

But as in most creative pursuits, there's a difference between having the inspiration to take on a project and finding the skills and materials! Before signing up I went to a local thrift shop to see if anything caught my eye. Nothing interesting on the Ladies rack, so I headed over to Menswear and there it was, calling my name...


The fabric is a black and cream houndstooth in tight woven wool.


When refashioning, the size of the original garment is crucial to the overall success of the project. It didn't have a size tag, but I'll take the Rochester Big Tall Clothing tag as a positive sign!


I had rummaged my pattern stash and found a few items suitable for undertaking the muslin, but before leaving the thrift shop I looked at their patterns... and what are the odds? They had an unused Vogue V7975 in my size (cost: 25-cents)! How could I not sign up after all that?

Saturday, January 9, 2010

Trim me up, Scotty!

As you might recall, Marji was in NY late last year, and she very kindly offered to find some trim for my yummy red mohair boucle. Thank you SO very much, Marji! I visited Mood myself just a week ago, and it's an eye opener. As the saying goes, there's no place like it!

Cap'n, I'm givin' ye all she's got:

So here we have four interesting possibilities - an all-black grid, two in red & black and very different from each other, and the fourth a very interesting one combining red with grey instead of black. I truly love that one for its out of the envelope colour combo, but want to save it for something either somewhat more orange or plain grey, probably the latter, to make the orange serve as an accent.


How do you like the plain black mesh? I think it needs something - the effect is a tad severe. Because it's black, I think I'll also set it aside for an easy match to something else.


WOW! This one's really a WOW, isn't it?! Baroque and Rococo and more! My only fear is that it might be a bit overwhelming on a jacket. But on a longer coat, it would really rock! Wouldn't it?


OK, we're down to #4, the proverbial last but not least. A bit more restrained...whew! I have enough to trim up four pockets, and probably the shoulders too - as that appears to be the Langerfeld touch in recent years...

What say ye, ladies? Let's put it to a vote: which trim works the best? Don't be shy - you already saved me from the icky heavy metal and the fuzzy caterpillar.
(you can click on any of the pics to get a closer look; the pics were taken in daylight). And, thanks, all!

Friday, January 8, 2010

buttonhole test


Test a la chanel hand buttonhole


Right side view of the test buttonhole


Reverse side of the buttonhole

I used Claire Shaeffer's technique explained in Couture Sewing Technique (page 91) to make this test hand buttonhole.
Viewed from the outside it is an embroidered buttonhole with a bar and fan. On the underling side it is a bound buttonhole.
This method is time consuming, but it is meant to be nice to look at from both sides.
What I like best about the result is that despite the fabric it did not fray at all and I am very pleased about that. To avoid fraying I applied beewax on the edges before overcasting.
What I am not pleased with is the thread I used (cotton quilting thread) I know I should have used silk buttonhole twist and what is called gimp for the strand but unfortunately these are impossible to find where I live. I've found a british online store and I'll probably pass an order with them.

I intend to use these buttonholes for the sleeves vents which are meant to be functional. That's another Chanel traits.

parting shot:
two closeup shots of a vintage Chanel Jacket


I found them here. I suppose they are David Page Coffin's drawn from Behind the Seams The Claire Shaeffer Collection: Part 1 CHANEL


Thursday, January 7, 2010

Chanel Quilting and Basting

Hello everyone. It has been awhile, and let me tell you...I am on a roll and excited about my Chanel. I mean, I have always been excited about my jacket and this sew along, but I have tried to make the jacket along with other sewing projects which didn't work. Now that I have enough winter clothes and the holidays are over, I am concentrating on the Chanel--just the Chanel! The deadline might have past...but the sew along is still going strong so if you are interested in still participating, please email me! There has been several new sewists who have just joined in the past week.

Today I finished quilting my pieces. I am sticking with the Susan Khalje's Thread 121 article.

1. I cut the silk charmeuse roughly the same size as my boucle pattern pieces. The wrong sides are together. 2. I pinned where I needed to quilt. The lines are one inch apart. I stopped two inches above the hem. Also, I left a bit more than an inch at the seams/edges.
3. Here you can see the quilt stitching on the charmeuse side. The walking foot has been a big help. No slipping fabric! Important to mention, do not backstitch when you are sewing the lines! Just wait...
4. The most time consuming part so far...was pulling the threads on the ends to the inside and knotting. I used a pin to help pull.

Right now, I am beginning to baste the jacket together! It is exciting to see it come together.

I pinned the silk out of the way with silk pins. Then I basted on the thread traced lines

Elizabeth, you are right. The seam allowances are so big that, I hope, it won't be hard to get a right fit! Be back soon!

Monday, January 4, 2010

FIRST FITTING


I don't really understand how you can do a fitting on anything when you have an extra 10" of bulk from large seam allowances to contend with but despite that handicap I was pleased with the first fitting. I wanted this jacket to have more ease and since it was comfortable at this point I thought it would be fine once the excess seam allowances were trimmed. At this point I had quilted the lining to the fabric and machine basted all the seams. After the fitting I stitched the seams of the jacket body, trimmed the excess seam allowances and prepared the lining at the seams for fell stitching. Thankfully, I had not yet done the fell stitching, only basted the lining in place because when I put the jacket on again and it was too tight! Although I had heavily steamed the fabric before cutting there was still shrinkage from pressing the seams. Next time the fabric goes to the cleaners for professional pretreating! There was only one option and that was to rip out the center back seam and the side seams and try to gain about an inch through the jacket body. Ripping out 3 seams in this fabric took an entire afternoon. The fit is now acceptable but not what I really wanted. Before I cut the sleeves you can be sure the fabric will be steamed, steamed again and steamed some more. I am bad about holding a grudge, so for now the jacket is pushed aside waiting for the day that I can look at it again without being angry and enjoy the process.

Saturday, January 2, 2010

I'm sew embarrassed

I'm so embarrassed....I should have finished my jacket by now, and had high hopes.

However all is not lost. I actually have a deadline (this means probably an all-nighter - oh and I LOVE my all-nighters when I get to sew all night long - no phone calls, clients, emails, messages - nothing to bother me!)

My fabric is here staring (OK, it's been giving me dirty looks all though this last blizzard....what are blizzards for anyway if you can't catch up on your sewing!), at me and I have my new labels and I'm dyin' to put them in sumptin' - anything.

But most of all I want to show my students what you can actually do with some gorgeous fabric and skillful techniques....all you have to do is know them and practice them, and voila...you too can have a couture constructed wardrobe.

So if this blog closes before I get the jacket done, I'll post it on my blog (hopefully it won't), but don't wait on me. Otherwise I'll feel guilty - I've already got enough guilt about my tardiness in finishing this jacket!!!!

;-)